Personalized photo frames for gifting this festive seasons

I wanted to give something personal for the little ones in the family and the friend circle.
Hence these cute frames,if I may say so myself......
And they are really very simple to do,bit of colors and imagination and you are all set.
Here is List of MATERIALS REQUIRED
1. Ready photo frames (1 dollar store kind)
2. Laser cut MDF or wooden Alphabets
3. Laser cut MDF ,wooden or chipboard butterfly
and flowers or any other embellishment of your choice
4.Gesso (or even white acrylic will do)
5.Thin (no.0)and thick (no.5) brushes
and tooth picks (to make small dots)
6. All purpose glue (fevicol) or Glue gun
7. Mod-Podge , Glow-in-the-dark one
LET'S START

STEP-1. Please select a photo-frame with flat surface not the rounded one.
Otherwise alphabets will slip when you are sticking them with all purpose glue.
Though with glue-gun , there is no problem.
But as i was doing this project with kids and for kids,I knew little rough handling is going to be there, so i went for easy and safe ones.....
Anyway, clean the frame with little damp cloth.

STEP-2. Take your alphabets of a NAME,clean and file them.
I had taken these MDF alphabets to show you the procedure.
These alphabets are not the laser cut ones but the hand cut,and some corners were not so clear,
so i filed those tit-bits with my nail filer,and now they are good.
(And you know what, one can cut them with thick cardboard also,
it just will need more patience than normal.....)

STEP-3. Apply 2 coats of GESSO , keeping the interval of 15-20 minutes in-between.
For this project, one can even use 2 coats of White Acrylic Paint if you don't have Gesso.
Now the question is WHY apply white as base ??
Simple, because if you apply acrylic color directly on wooden or MDF products,
they absorb colors, as they are porous materials.
So the vibrancy of you color is little brownish and muted.
Where as white Gesso or white acrylic as base helps reflect colors.
And they look bright and fresh.

STEP-4. Once the coats of Gesso is dry, apply 2 coats of Acrylic Colors of your choice.
Keeping the interval of 15-20 minutes of drying time in-between the coats.

You can paint same color to all the alphabets of a name, or color them in multi color.
I wanted to make it look colorful,on a plain base photo-frame,hence different-different colors.....

STEP-5. Now it's time to decorate.
Add color-on-color (Dotted "R") or contrasting color (Stripped "C")
add dots, stripes or what ever takes your fancy.

STEP-6. Lastly apply 2-3 coats of MOD-PODGE ,
Glow-in-the-DARK one on your alphabets.
Mod-podge seals and protect your handy work.
And the added bonus is because it's "Glow-in-the-dark Mod-Podge",
it absorbs light throughout the day and glows softly in the dark,
in your kids room,
when you kiss them "Good-night", and switch-off the light.

STEP-7. Repeat steps 2,3,4,5,and 6 for these beautiful butterflies and flowers,
or whatever other embellishments you are using......

STEP-8. Now your embellishments and name alphabets are ready....
It's time to GLUE them all on your frame,
either with all purpose glue (that takes time)
or glue gun (quick and fast)
And you are DONE.....
Your little ones can go off to sleep seeing their names glowing in the dark.
WHAT FUN!!!!!!
And the possibilities are endless.....
For the younger ones i had done the whole thing, except letting them paint here n there.
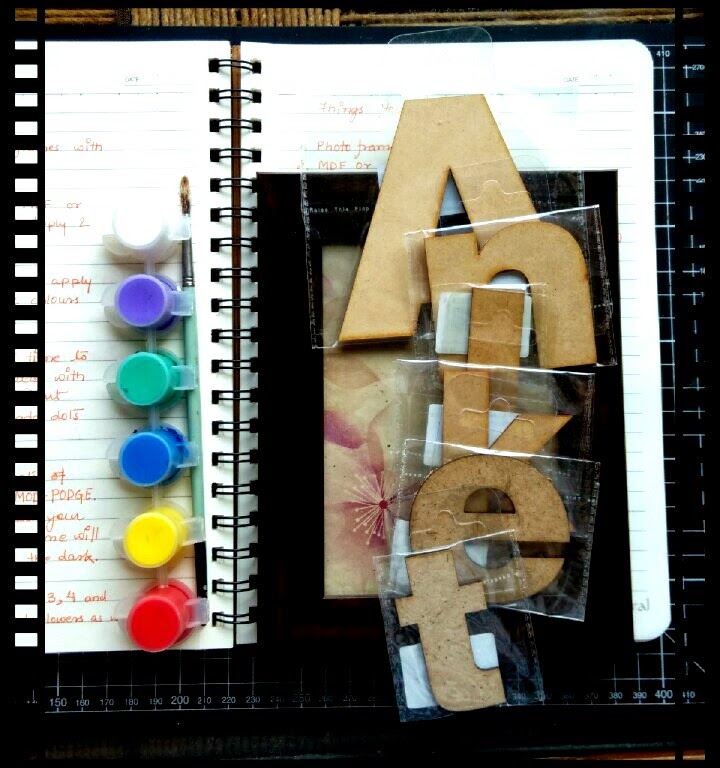
But for the older ones I had assembled a
DIY kit,
which includes Printed instructions
+ A Frame
+ Alphabets of their NAME
+ White acrylic for base
+ 6 small tubes of acrylic color
+ Thick n thin brushes
+ A small tube of all purpose glue(Fevicol)
+ Mod-Podge (Glow-in-the-dark)