Friday 30 September 2016

Mixed Media Arty-Crafty Magnets

Hello and welcome dear friends....

At the end of my kid's exams (means just 4-5 days back) I came across Mudra Craft Stamps 1st Challenge , and I Loved the theme - ANYTHING GOES ....
And being a crafter what else you can ask for ;)
So here is my take on it....


Design By Shilpi

I have this beautiful mudra stamp named "Dreamcatcher" which I have been wanting to use for some time.

Design By Shilpi

As I made 4 canvas kind mixed media magnets.
I had planned to sketch a face on the forth one to complete the story,
But instead used "Prima marketing inc 's Bloom collection"

Design By Shilpi

I loved it even better....It so very much goes with the visual image I had.

Design By Shilpi

There are layers of fun involved in these magnets....
but as I'm running out of time for today, I'll write the detailed tutorial post tomorrow ;)

Design By Shilpi

Can you guess my secret....No!!!.... I'll reveal it all tomorrow....

Design By Shilpi

I have used die-cuts,
I have done stamping,
I have done decoupage,
And off-course
I have done coloring...

Design By Shilpi

Design By Shilpi

Design By Shilpi

Design By Shilpi

Linking these Magnets to


So,
What do you say....How do you like my magnets....
Do let me know .....your feedback means a lot....

Cheers
Shilpi


Wednesday 28 September 2016

Decoupage on Die-cut Textured Birthday Card

Hello Friends, Welcome !!!...

Birthday's are suppose to be full of sunshine and rainbows
And love and laughter....
And off-course diamonds and roses are a girls best friend
Today and years after.....

Design By Shilpi


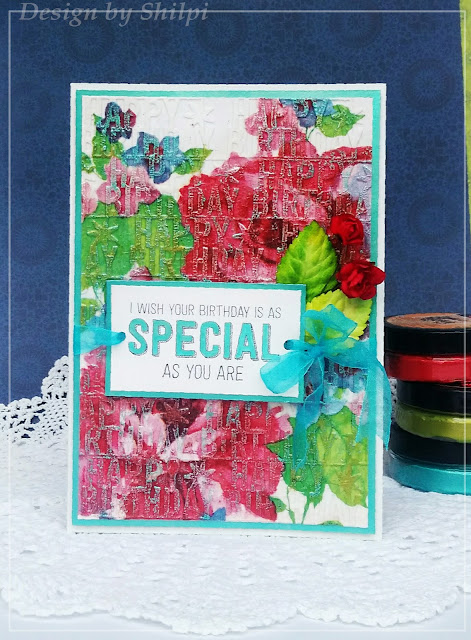
So today I'm here with a birthday card
Which is very close to my heart,
As it's for my childhood best friend,
Who has been their in my life from the start.

Hmmm !!!!
What's happening today....everything seems to by rhyming.... 
"Funny Mamma!!!" as my daughter will say...

Anyway.
Now a days I'm having fun combining  different different techniques....

Design By Shilpi

I started this card by creating textured background. With Martha Stewart's punch, 
I have cut strips of "Happy Birthday". 

 Design By Shilpi

Then pasted those strips uniformly on card stock with all purpose white glue. 
That created a non-ending textured background.
It was looking really nice.
What say ?!!

Design By Shilpi

But my need to add color has prompted me to try decoupage on top....
So here I go....

Design By Shilpi

I took a beautiful big rose printed decoupage tissue. 
Measured and cut out all the extra bits. 
Removed the 2nd ply of tissue. 

Design By Shilpi

Design By Shilpi

Applied Mod-Podge generously on my "Happy Birthday" textured background.

 Design By Shilpi

Design By Shilpi

Pasted the tissue carefully, so there are no bubbles or  unnecessary creases.

Design By Shilpi

Design By Shilpi
  
Applied another layer of Mod-Podge on top as well. 

Design By Shilpi

Pushing the brush in all the crevices and corners, 
so the "Happy Birthday" texture is well defined for my next step.

Design By Shilpi

This is how it was looking when it was fully dry....
Beautifully wrapped around all the alphabets.

Design By Shilpi

Once everything was dry, I applied distress ink on raised texture to enhance it more.... 
Can You see it ?? 
I had used "Peeled Paint" on leaves and "Festive Berries" and "Abandon Coral" on Roses
It really was looking superb. But...

Alas !!!
It was no go. As Mod-Podge is a sealant it doesn't allow water based Distress ink to stay on top. So the moment my hand touched the inked texture I got stamped ;) 
Can you believe that.....

(Good for stamping from your own die-cuts, that's the experiments for next post ;) ) Anyway!! Either I should have used permanent stamping ink or I should have applied clear Gesso before inking it. Gesso would have helped distress ink to adhere properly. *New Learning*  HmmmmI!

Design By Shilpi


Design By Shilpi


So I switched to Inka-Gold colors then.
Love the smooth thickness and rub-on quality of Inka-Golds.
Followed the same color pattern ratio as in printed tissue, in 1st layer of coloring. 

Design By Shilpi

Design By Shilpi

In 2nd layer of coloring added a bit more of pink, as it was working as neutral enhancer. 

Design By Shilpi


Then in 3rd n final layer of coloring I used the complementary color
so the "Happy Birthday" texture pops-up nicely amidst the strong enough print.
Yaay!!! My textured background  was ready.

Design By Shilpi

Next I stamped my Birthday sentiment on a small piece of card stock with archival black ink.
I really like this birthday sentiment stamp from Mudra stamps....You know WHY ??

Design By Shilpi

Because this sentiment says "SPECIAL" in double lined font. And that gives me a chance not only to have my sentiment in strong solid black but also to fill in the color of my choice ,in my sentiment, to match my card..... Double Yaay !!! 

Design By Shilpi


P.S. I filled the SPECIAL with watered down Inka-Gold color itself.

That done, I assembled the card together.

Design By Shilpi

I pasted the textured and decoupaged background on aqua card stock.
And pasted them on my card with double sided foam tape.
Adhered my sentiment tag on top with organza ribbon and double sided foam tape.
And lastly added cute little 3D paper roses and leaves to finish the card.
What say !!!

Linking this card to 

MudraCraftStamps CHALLENGE #1 - ANYTHING GOES

Craft Stampers Take It Make It Challenge

Thanks for taking the time to stop by....
Do let me know how you guys like my card....

Cheers
Shilpi

Monday 1 August 2016

Watercolor Poem Illustration - I know an old lady who swallowed a fly


I know an old lady who swallowed a fly 

Design by shilpi
I know an old lady who swallowed a fly.
I don't know why she swallowed a fly.
Perhaps she'll die.
Design by shilpi
I know an old lady who swallowed a spider.
That wriggled and jiggled and tickled inside her.
She swallowed the spider to catch the fly.
I don't know why she swallowed a fly.
Perhaps she'll die.
 Design by shilpi
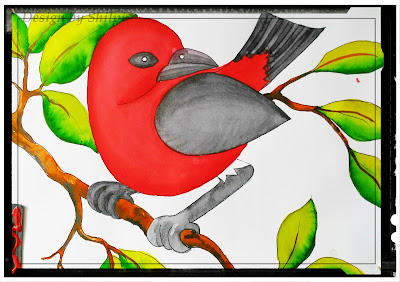
I know an old lady who swallowed a bird.
How absurd to swallow a bird.
She swallowed the bird to catch the spider.
That wriggled and jiggled and tickled inside her.
She swallowed the spider to catch the fly.
I don't know why she swallowed a fly.
Perhaps she'll die.
Design by shilpi
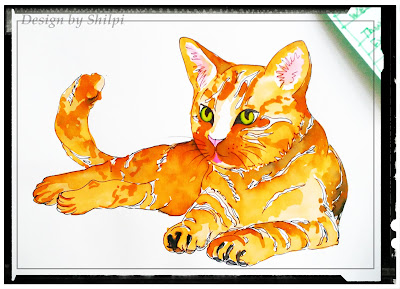
I know an old lady who swallowed a cat.
Imagine that! she swallowed a cat!
She swallowed the cat to catch the bird.
She swallowed the bird to catch the spider.
That wriggled and jiggled and tickled inside her.
She swallowed the spider to catch the fly.
I don't know why she swallowed a fly. 
Perhaps she'll die.
Design by shilpi
I know an old lady who swallowed a dog.
Oh what a hog to swallow a dog.
She swallowed the dog to catch the cat.
She swallowed the cat to catch the bird.
She swallowed the bird to catch the spider.
That wriggled and jiggled and tickled inside her.
She swallowed the spider to catch the fly.
I don't know why she swallowed a fly. 
Perhaps she'll die.
 Design by shilpi
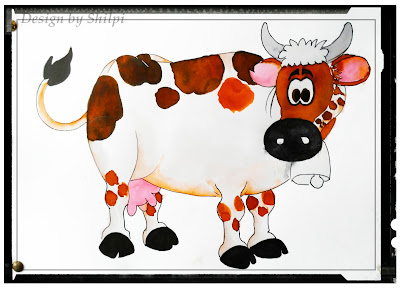
I know an old lady who swallowed a cow.
I don't know how she swallowed a cow.
She swallowed the cow to catch the dog.
She swallowed the dog to catch the cat.
She swallowed the cat to catch the bird.
She swallowed the bird to catch the spider.
That wriggled and jiggled and tickled inside her.
She swallowed the spider to catch the fly.
I don't know why she swallowed a fly. 
Perhaps she'll die.
Design by shilpi
I know an old lady who swallowed a horse.
She died, of course!
Design by shilpi

Friday 6 May 2016

Roses for Mother's Day

Shaded Pink roses 

Depicts

“Filial Love—the love of a child for a parent”  

Handmade Paper Roses


It fascinates me to know that different flowers are associated with different symbolism and are used for different purposes. That got me reading about flowers and selecting few to try my hands on making them.....
I started with Roses - Red roses were said to be the favorite flower of Venus, the ROMAN GODDESS of love and beauty. And you know what - it's one of the most ancient symbols of LOVE and Beauty. The flower itself depicts the color Pink or Red. And one of the meaning ascribed to the pink rose is “Filial Love—the love of a child for a parent”, Wow !!!!! I just love that, especially in the case of mother's day

So here is my simple way of making them....


As I don't have any die cutting equipments, I make my flowers in much more baser ways.... 

Handmade Paper Roses

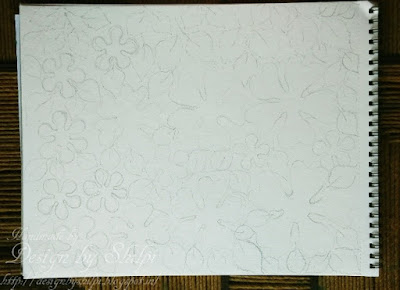
Step 1. Very lightly I drew, different sizes of the same 5 petal flowers on an A4 size, 210 gsm water color paper. 
* Why watercolor paper ?  - because for making flowers I'll be doing lots of shaping and molding in semi wet state of paper, along with water-coloring, Off-course. So I definitely need a paper which can withhold lot of fiber displacement, yet not give away. Another plus is it gives beautiful texture and good volume to the flowers. So - Why not ?  ;-) 

Handmade Paper Roses
Step 2. Used "Worn lipstick distress ink pad" for water coloring my roses. And "Mowed lawn and Peeled paint distress ink pads" for water coloring my leaves.
* And the technique is pretty simple.... 
I applied my distress ink pads on an OHP sheet to transfer little color, and because it's an acrylic sheet it doesn't absorb the dyes. Now I simply picked up the colors with my Aqua brush and painted my roses. ( you can definitely use your craft mat instead of OHP sheet for this ;-) ) 

Handmade Paper Roses

Step 3. Once dry I fussy cut all the petals and leaves separately.

Handmade Paper Roses


Step 4. I colored the backside of the flower petals with watery color made with "Worn Lipstick Distress ink pad"
This time however I applied my distress ink pad, couple of more times on OHP sheet and then spritzed water 5-6 times rather then my usual 1-2 times for normal water-coloring....that's it....N in went the backside of my flowers in the watery pool.....

Handmade Paper Roses

Step 5. Placed petals upside-down for the excess color to dry off.

Handmade Paper Roses


Step 6. I shaped the flower petals with my fingers and stylus when they were still semi wet.
* Started with the smallest one.
This is the only petal, which I had to use other way round....

Handmade Paper Roses


Step 7. Pasted a small thermocol (polystyrene) ball in the center of the petal.
* Then wrapped the petals around it, making sure they overlap each other. ( Works as a locking system as well....

Handmade Paper Roses


Step 8. Then worked the 2nd, 3rd, 4th and 5th petal form back side with stylus, that loosens the fibers of the paper, makes it more malleable to shape them.
* Shaped the front of the petals diagonally on my stylus's handle.
*Pushed the center of each petals with the stylus or back of the brush....so the petals pop up.

Handmade Paper Roses


Step 9. Pushed the center of the 2nd petal with my fingers to make it smaller and closer, and glued it to the first closed up petal.

Handmade Paper Roses


Step 10.  Did the same with rest 3 petals n glued them all.
* Re-shaped and adjusted the petals a bit to make it right, and my beautiful rose is ready to adorn my card. 

Handmade Paper Roses

What say !!!!    
Hope I was able to explain it better with so many pictures and text.....                 
Do let me know, what you guys think about it. Your feedback means a lot.
And Thanks a lot....do drop in again to see how I assemble my Mother's Day card along with this ROSE....

Hugs & Kisses Shilpi