Sunday, 28 February 2016

Mixed-media crumpled tissue HEART

Follow your HeART, Believe in your DrEAMS & CrEATE.....


I remember in my school days we used to make card-board Science models or Papier Mache Art-projects. And to give strength and stability to our projects, we used to layer it with newspapers and tissues. Obliviously sticking it with PVA glue mixed with water. And once dry, it used to be really super-duper strong. But what I used to hate was the creases or the crinkles coming in my super smooth finish models, while applying tissue paper. And if you try to smoothen it too much, then you’ll end up spoiling it even more, as the wet tissue will lump-up.  Sob! Sob!

Who would have thought that the things I perceived as mistakes in my childhood, would be turned around and used as techniques in creating textures, in my ART today.

So from Sob! Sob! – to- Lol! Lol!

For my ART- JOURNALING nowadays, I’m using Bilt’s matrix premium notebook, it's in B5 size, and has natural, ruled, 75 gsm paper, though I could have done better with higher gsm but I absolutely love the natural off-white color of the paper.

As the title suggests, this is a crumpled tissue Art-Journal page. 

                                                                             
So I have taken 3-4 tissues (normal facial tissues, that comes out of a box or any old tissue paper will do, even the ones from shoe boxes.) Another reason to hoard all the junk ;)                                           Anyway ----- I had crumpled all the tissues nicely, so they have lots and lots of creases.                        The More the Merrier!!!
Then I applied the PVA glue mixed with water (2:1 ratio) on my journal page, and glued the tissue, creasing them even more, so that I’ll have this beautiful texture to play around with.


Let it DRY overnight, though drying time may vary. In summers it will dry within 3-4 hrs. But in Winters, it can take up to 24 hrs. And if you are as impatient as I am, I’m pretty sure you’ll end up picking up your heat-gun/hair dryer to fasten up the drying process. Be careful! As heat-gun can burn tissue easily. I almost did. But, do make sure that you blow hot air on both the sides of your journal page for proper drying.


When it was completely dry, I painted over it in shades of Yellow and Orange acrylic colors. I used Pebeo’s high viscosity acrylic, so I needed to dilute it a bit, but not too much, as I like the dry brushing kind of effect.


I love the bit of white peeping underneath the yellows.
Once the base coloring was done it was time for my big HEART.
                                                                                                         
Well it’s season of hearts!!!!

As it's 2 page spread, I drew my heart in such a manner, that a bit of it is on the 2nd page as well.       Really like the holes punched on the page, it adds another dimension to it. For coloring my heart, again I have used my Pebeo’s acrylics but this time I didn’t dilute it at all, as I wanted to see through all the layers of color. From Yellows – to – Oranges-to – Reds – to Maroons –to- Black. It’s a dry- brushing technique that I have used on my heart. Started with the lightest color in the center and ended with the darkest color at the edges of the heart. Reducing the area of each dark shade applied towards the edge. Hmmmm ! Not bad !


Hearts done, I started fooling around with my GELATOS (wonderful gift from my sis-in-law). Very lightly I rubbed the orange and red gelatos over the parts of my textured journal page. It highlighted all the beautiful creases and folds. 


O ! I love it ! 
Next time I am definitely gonna do the same bit with contrasting color gelatos. That will be AWESOME !!!!!


I so very much wanted to stamp some flourishes. But as luck would have it, my permanent Archival Ink was running dry (that reminds me, I need to add reinker in my art supply list) And I guess the tissue texture too, is too strong to take the stamped impression properly. Though I was not hoping for the perfect image but still better than what I got on my sample piece. So, after a few trials-n-errors I ended up doing freehand drawing of flourishes with 0.5 tipped permanent marker.    
                                               
Huff ! Huff !!  
Trust me, it was not easy to have free flowing curves on textured background.
Almost done. Just need to add a sentiment and my page would be complete.                            
Earlier I made a tag,but somehow it was not going with the layout, so again I ended up writing the sentiment as well. Though I have used 0.1 and 0.3 calligraphy pens to write the sentiment, but because of the background texture it doesn’t look like much of calligraphy.    
                                                             
But I’m happy with the overall composition.                      


What say !!!!                     
Do let me know, what you guys think about it. Your feedback means a lot.
Thanks a lot....do drop in again n see what all I'm doing in coming months....

Linking it to...
1. More Mixed Media Challenge - "Red"

2. Lulupu's   Challenge #58: Hearts And Arrows


Wednesday, 24 February 2016

Fun with Water colored Scraps….

Happy Anniversary Card 


It seems I’m too much into water coloring now a days. (At least in my head for sure;)
Trying out different – different inks and dies on every bit of watercolor scrap paper I can find. Exploring techniques and combining them for different looks.                                                            

I think it will be good idea to do them on little big paper instead of small small scraps that way I can make a proper catalog of all my trials-n-errors. Hmmm!  Well that’s a task for coming week then. 


So here I’m with bits and pieces of vibrant water colored paper, ready to make a LOVE card. For making these colorful scraps I have used Pebeo’s cake watercolors, Nirmal’s transparent photo colors, Tim Holt’s Distress Ink, Camlin’s liquid watercolors to name the few. Tried techniques like wet on wet, wet on dry, color blotting, color lifting, splattering, blending, salt on wet wash, stippling, stamping and even stenciling. If you are not into water coloring, you must be wondering what gibberish I’m talking about….don’t worry, these are just big big names for actually having lots of water coloring fun……       
My next post will definitely be all about water coloring only as I had loads of fun for sure!!!.... 


Now, the only problem is, these scraps are of 300gsm watercolor paper, pretty painful to punch. But I put all my “Heart” punches to good use. And just to be on safer side, simultaneously I punched some layers of foil too. It keeps the punches sharp, you know that- Right!!! I punched all sizes of hearts, and what I was not able to punch, I ended up cutting with my paper cutter.


Stamped “L.O.V.E.” from “Simon says STAMP’s –All about Love set“ with permanent Black Archival ink on my card stock. I had cut the alphabets separately and assembled them together by overlapping them. 


Stamped “YOU & ME” from CRAFT’S clear stamp, directly on my card with “Festive berries Distress Ink”. Added clear rainbow glitter around it, so that it shimmers under the Red Heart cut scrap.

Stamped small “Love” from MSE’s - Anniversary Innies & Outies clear stamp set on a small card stock, again with “Festive berries Distress Ink”. And added Aqua rainbow glitter around it in Heart shape. And on top added Light Green color negative scrap left, after punching the heart. 

The rest of the Anniversary sentiment on and inside the card is also from  MSE’s - Anniversary Innies & Outies clear stamp set. Stamped with permanent Black Archival ink.


Ended up using 4 different clear stamp sets for just one card, bit too much, but so worth it. They all came together beautifully. 


With the whole combination of stamps and punched scraps I can make many more cards and tags. Will just need to alternate between negative and positive of punched heart scraps.                              O !!! I’m so happy !!! 


Hope you enjoyed.
Do leave me your valuable suggestions, I really do appreciate them ...
Thanks for visiting....
Do drop in again and check what other cards and tags I make with these scraps.

Love
Shilpi

Linking it to 
1. Paru's Card Making Challenge  (Valentine theme using SCRAPS)


2. The Artistic Stamper  ( HeART Art + Rubber stamping)


Sunday, 31 January 2016

Hibiscuses in watercolor

Things on my table.... 

Some watercolors, some brushes 
Some blank paper, some sketches 
Some emotions to pen down.... 
And some colorful stories to bring around. 

Hello everyone.... 
Today I'm here to share some of my recent musing. 
Few days back, I have been to Goa, beautiful tropical place, our favorite family get-away destination, in winters. We have been there end number of times, yet it's never enough, not nearly enough. 
Nice bright and sunny, away from Delhi's freezing gloomy cold. 
Sun, sand and sea, that does it for us.....We love it. 
There is so much to see, so much to do.... 

This time I smuggled a bagful of my papers and colors, along with other paraphernalia of beach vacation.  ( Don't ask my dear hubby's reactions, once he realized why my hand luggage was so heavy ;-)  that's a story for another time.... Lol) 
Anyway..... This is what I came back with.... 
Lot's of sketches and pictures, water-coloring and even mixed-media.
(Off-course!!  That I did with sand, soon enough I'll share that as well...) 


Freehand 1st trial of Red Hibiscuses.... No pencil sketching, just colors straight on paper... It was fun to see colors flowing into each other.... 


Now here starts the sketching bit, and I realized I have become so rustic that I must have erased hundreds of time..... The cold-press watercolor paper must have gone for toss, because I had erased all the size... Hmmm.... Will try and see how it takes color... 


This was White Hibiscus, so before I did it on really good artist paper, I tried my hand on my little ones sketchpad.... Not bad!!  I never thought that a simple sketchpad can take watercolor so beautifully, though paper did go wappy while I was doing the background. But it turned flat later on.


I'm really impressed by the colors of real Hibiscus in all the coastal areas.... From whites to yellows to oranges to reds to pink....some simple and plain in solid colors, some with such awesome shades in the center..... It's simply Wow !!! 
I could spend ages gazing at them (And I actually did, oblivious to my kids long faces. And trust me, that's really big feet to achieve,when they are constantly going on and on "Let's go to BEACH ") 


This definitely had turned up far better than the previous one.... ;-) 
Love the shade of mustard to bring out the folds of flower petal in-comparison of purple.


But still a long long way to go it seems.... It's so much easier to paint them with solid acrylic colors Or other mediums, especially for canvass or textile prints.... Watercolor definitely demands quite a bit of patience and practice....


Yet another try with different kind of water-coloring style.... 


After drawing and painting them single single, I tried my hand at composed sketch... 


I like the way this sketch has turned out -  hope I'll be able to do justice to the whole composition.... 

For all my water-coloring explorations I have used
Brustro's water-color paper 300gsm 7"x 10", 
Camel brushes,

Hope you all like my foray in water-coloring flowers....
Please do leave me your valuable suggestions, I really do appreciate them....
Thanks for visiting....
Do drop in again to check out how I manage to do rest of my water-coloring....


Thursday, 30 April 2015

My " Flutterbies"

Even in my dreams I see Butterflies.....


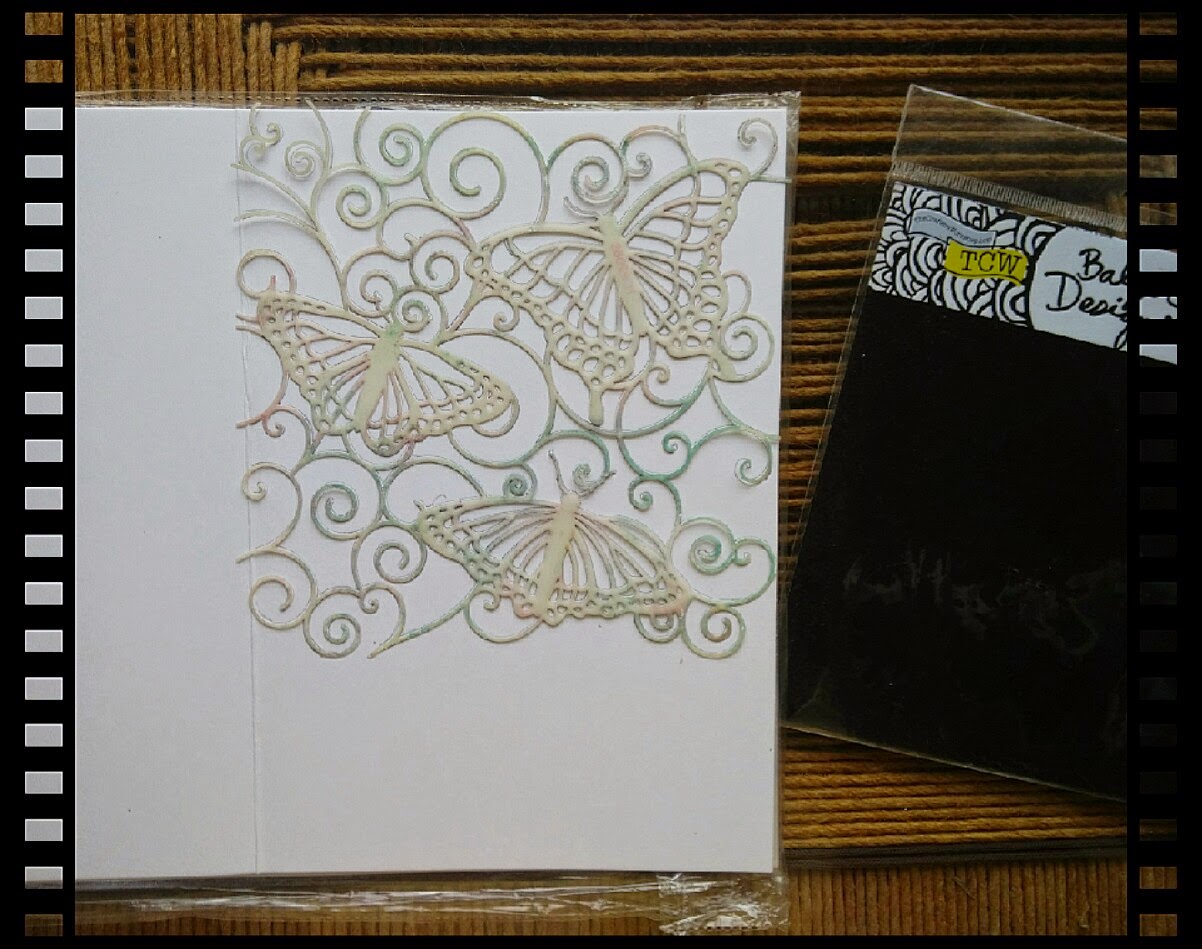
For the first time in doodling I tried the reverse sketch technique with the help of stencil.....
Though I still wish that I could have given little more depth,so the butterflies stands out little more.....but still....Love the way it has turned out.
What say...
Now I am wondering how to proceed further....
Should I just frame it like this ??
Or
Use it as my cards background, and add colors with my 3D paper flowers...
Hmmmmm...

Anyway....
Let me first show you how I did this, then maybe you all can help me decide what to do more...
So here we go.....


Though I love cutting my own stencils,but this one is of "Blazer Designs" from

TheCraftersWorkshop.com  ( Internationally)
Try Crafterscorner.in  (India)
or Thecraftshop.in  ( India)

One of my absolute favorite stencil, curtsy of my good friend Nikki .... ;)


I placed the stencil on my card stock and simply traced the out lines with a very light pencil.


After tracing the stencil once I was left out with space at the bottom, so this time I placed the stencil little tilted and traced again, and again....and covered the whole of A5 size paper..... 
(I had sharpened the image and increased the contrast so that it is shown very clearly here.)


This is my ready A5 size card stock, with beautiful butterflies traced on it.....


Now I'm ready to start my doodling.....
I have used 0.2 and 0.5 Rotring Isographs pen for this doodling, my absolute favorite....


And as I wanted to do the reverse sketching, I started with filling out the negative space in the butterflies, rather then the positive....
Once the butterflies were done, it was time for the background....
And there instead of just filling the background , I made my life complicated ;)
I added flowers as filler to give a look of another layer....


And Viola !!!!!!
My "flutterbies are ready to fly off.....
Especially for Cheryl B. Lemine.....

Hope you all like my work....
Please do leave me your valuable suggestions, especially about what to do....
I really do appreciate them...
Thanks....n stay tune to what I do with them further in my next post....

Tuesday, 31 March 2015

3rd BIRTHDAY Shaker Card

For my darling nephew....

...inspired by challenge at Lulupu


The Idea for a 3rd birthday card,especially for my little cutie-pie nephew has been bouncing in my head for quite some time....but what with my kids exams and all, this month just flew by.....and before I knew it ,it's already end of the month. 
Seeing Lulupu's this months challenge, galvanized me to do it......so here it is....

In this card I have incorporated lot's of small small techniques which has appealed to me in last couple of months.

1. Making clouds for your background


  Since I saw this technique on "Pinterest", I have been wanting to Incorporate this in one of my projects.....And I guess I went over-board....lol....instead of just cutting a simple paper cloud I ended up making my own stencil with 210 gsm OHP sheet. And added not only clouds but Sun too....    


For making my stencil ,I roughly drew some clouds and sun on a piece of paper, and then traced it on OHP sheet. Cut the whole thing with my trusty paper cutting knife , and I was good to go......


After roughly placing my balloons , got the idea where all I needed to add clouds so the background doesn't looks blank.....Used Tumbled glass distress ink pads and my stencil to achieve this....


2. Making shaker box


I have this beautiful " Martha Stewart's HAPPY BIRTHDAY Punch....It was ideal for making my Birthday shaker box....


After punching I left little extra paper on all three sides and added a thin strip on top as well as I wanted to make a box and give it a look of "Treasure chest".


With thin red strong double sided tape I added little ohp sheet....
Then I added thick foam tape so it makes a bracket for my sequins.....
And my Birthday tag was ready to be fixed on my card along with colorful glittery sequins....


Lastly drew belt straps,buckle and stitching lines all around to give it a look of "Treasure chest".  Filled with all the happy colors..... 


3. Balloons from scraps of gift wrapper


Yes ! that's right I had strip of gift paper left,after packing a gift for my little one's friend. The balloons were so colorful and shiney that I didn't wanted to threw that.


So I'm finally making a good use of that...lol...
I decoupage the balloons on thick card paper, once they were dry ,I cut just three of them out,as its all about 3rd birthday day.


One thing though, Mod-podge has kinda dulled the shine of the balloons....and I can't make up my mind whether I liked that effect or not.


I guess I like it ....as it is making my sequins shines that much more....

lastly assembled everything together.... and my card was ready.....


Hope you all like my work.....
Please do leave me your valuable suggestions....
I really do appreciate them......
Thanks.....

P.S. ---- so very much wanted to enter it for lulupu blog challenge....
added the link and in between the linkup closed....missed it by couple of minutes....sob! sob!....